Don we now our leg, fa la la la la, la la la la. Today, Santa delivered my temporary leg just in time for Christmas. Well, not really Santa, but my wonderful prosthetist Brain, who measured, fitted and built my first leg.
As with all other aspects of this strange journey, I researched prosthetic legs in depth, however it just didn’t compare to actually experiencing it firsthand. Luckily I was referred to an excellent prosthetist who has held my hand and led me through the journey so far.
A prosthetist is the person who primarily designs, fits, fabricates, adjusts and maintains the prosthetic leg. Trust me, you get to know your prosthetist very well, so you’d better like them.
My relationship with Brian, my prosthetist, began in the hospital three days post-op. During this visit he took a history of what happened to necessitate the amputation and what my lifestyle was before the injury. The goal of the prosthetist is to provide you with a leg that best allows you to return to your pre-amputation lifestyle. Brian also provided a stump shrinker. The stump shrinker is a tubular compression sock that is used to control and reduce swelling, and is the first step in preparing the stump for the prosthetic. A few weeks after the surgery I met with Brian at his office. On this visit he walked me through the process and took some preliminary measurements. His office staff then set up a series of evaluations that would be necessary before fitting the leg.
Physical Therapy Evaluation – This evaluated my level of functioning. I was asked to perform a series of activities such as, standing on my remaining leg for 30 seconds without any other support, transferring from one chair to another without using my arms or any support, bending to pick an object off the floor without any support, walking with crutches and climbing stairs using crutches. This evaluation was used to assess my physical condition and functioning level. The information was then used to determine the amount of physical therapy I would require and to justify the level of leg I would need to the insurance company. I scored very high which got me recommended for a high-functioning leg and only the need for gait training.
Evaluation with Physical Rehabilitation Doctor – This was also to evaluate what level of leg I would require. This was an interview-based visit and assessed my current physical condition, what my lifestyle was like before the injury and what I hoped to accomplish with the prosthesis. This report was also given to my insurance company to justify the level of leg being recommended.
Surgeons Clearance – At 8 weeks post-op I received clearance from my surgeon for the leg fitting.
Now the fun part began: building the leg. The following are the steps involved in building the prosthesis.
 Casting of stump – A cast was made of my stump. The cast is used to get an accurate model of the stump for the fabricating of the socket.
First fitting – In this fitting I got to try on the leg for the first time and take some steps with it. The leg I used was a test leg and looked like something a high school science student put together for the science fair, however it did the job well. In this fitting the socket fit was checked and the pylon height and foot alignment was adjusted. With the use of a propane torch and an Allen key, Brian was able to make many necessary tweaks. By the end of the fitting the test leg was a close replica of what my temporary leg would be like.
Second fitting – In this fitting all the actual parts of my leg were used. Once again I tried on the leg and did some walking. Brian did some fine-tuning and then he was ready to put all the final touches to the temporary leg for the delivery.
Delivery – Today was the day I took my leg home. Brian had me put the leg on carefully, taking me through all the important steps. I then had some initial instructions on walking before leaving on my new leg. At this point I walk on the leg with the aid of my crutches. In the next four weeks I will work with a physical therapist and work on gait training. There will be a lot of taking the leg on and off in the beginning. The goal will be to walk using the leg without any other assistive devices. A one-legged man, however, will still have plenty of need for crutches. They will be used when the stump needs a rest, around the house in the evenings and for overnight trips to the bathroom.
The first leg is temporary and called a preparatory prosthetic. The preparatory prosthetic is used while the swelling is being reduced and the stump is shrinking. Its purpose is to prepare the stump and to learn how to use the prosthesis. When the stump is ready the permanent leg is made.
Parts of the Leg
Socket – Made of carbon fiber, this is the part of the leg that the stump fits down into and makes contact with the residual limb.

Pylon – Basically a pipe that connects the socket to the foot.
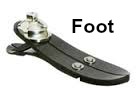
 Flex Foot – Made of carbon fiber, this foot is amazing. It mimics the natural motion of the human foot. It has a split toe and heel spring. All the mechanics are inside a foot cover. The foot cover acts as a filler to make the shoe fit. Honestly, this foot gives me way more flex than my deformed natural foot and ankle gave me.
 Donning the leg and keeping it securely attached.
I have had many people in hysterics over the past months by joking about my leg falling off and carrying it home. Prosthetic legs can lose their seal and fall off, but with the seal intact the leg doesn’t budge – Brian has demonstrated this by tugging it with all his might.
My new morning routine: Get out of bed, shower, shave, brush teeth, put on underwear, put on my leg and pull up my pants.
Step one, Liner – A silicone sock placed over the stump. This is a liner worn between the stump and socket. It clings to the skin, provides cushioning and creates a tight fit.
 Step two, Prosthetic Socks – These are worn between the liner and the socket. The stump volume constantly changes through the day depending on your activities, weather and many other factors. The socks come in a variety of plies (thicknesses). As the stump changes size it is necessary to change the sock ply to ensure proper fit throughout the day.
Step three, Socket – My temporary leg has a suction socket and sleeve suspension, although there are many other types of suspension systems and sockets out there. The stump is pushed down into the socket, where there is a pin hole. As the stump is pushed down the air is forced out though the pin hole. A one-way suction valve then closes the hole and forms a seal.
Step four, Suspension Sleeve – The suspension sleeve is rolled up over the knee and thigh. It is made of silicone and is pulled up over the socket and thigh to create an airtight seal between the thigh skin and the top of the prosthesis.
 As long as no air leaks in the leg is very firmly attached.
So there you have it – the wonders of modern technology. It is incredible that an artificial leg can be made so functional. While it has its drawbacks, such as having to put it on every morning, the prosthetic leg has allowed hundreds of thousands of leg amputees to return to active lives each year.
And hey, if I break this leg, I just take it back to Brian and get a new one – no pain, surgery, casts or prolong recovery involved.
HAPPY HOLIDAYS!
Thank you for reading! Please subscribe to never miss a post or come back in two weeks for my next post, “Just Because I Can”.
Also follow my story on Facebook.